Monday, January 31, 2022

Choosing Best Floral Gifts for your Loved Ones – Home Noon

The world would have been a duller place without flowers. The colours, fragrance and appearance – everything about them is simply irresistible. Given their aesthetic appeal, they make classic and timeless gifts that walk a fine line on every special occasion. You can never go wrong with anything flowers. But how about you broaden your thinking a little and go beyond a stunning bundle of blooms? There are plenty of impressive gift options that are not regular bouquets but also give a strong flowery feel. Here are some best floral gifts that will inspire you and make you root for them!

Preserved Rose

Preserved Rose

Source: Unsplash

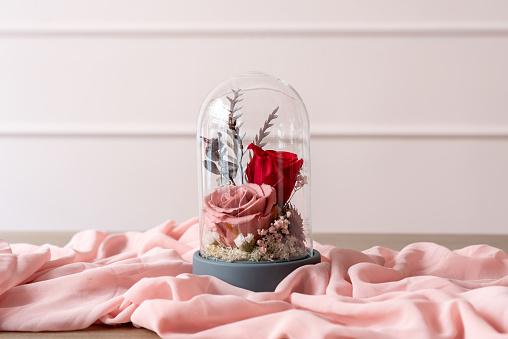
Disney made it popular with Beauty & the Beast! Not only is the preserved rose beautiful but it also lasts forever. Be it birthdays, anniversaries or any other occasion – preserved roses make an absolutely unique gift that expresses strong emotions. The gift will last for 3-4 years effortlessly when kept away from direct sunlight, moisture and dust. They are also available in a variety of colours. Besides, the gift carries a romantic meaning. So if you are looking for a way to tell your partner how much he/she means to you, wow with Preserved/Eternity roses. Know more about forever roses that last all year here.

Artificial Rose Teddy Flower

Artificial Rose Teddy Flower

Source: Unsplash

An artificial teddy bear that is made of flowers! The gift is lightweight, long-lasting, super-soft and great for V-Day, Mother’s Day, Weddings, Anniversaries and many more occasions. This makes a cute floral gift idea for someone who likes both teddy bears and flowers. The gift will convey love, romance and care (all at the same time) in the best possible manner.

Flower Kit

Flower Kit

Source: Unsplash

A bouquet of flowers is lovely but it doesn’t last. Henceforth, a packet of flower seeds will be a nice gesture for anyone who loves growing garden beds all year long. You can buy a herb and flower kit online that comes packed with different flower seeds. It is truly among the best floral gifts that keep on giving. The best part is that a flower growing kit will last a whole lot longer than a fresh bouquet. Not to mention, the gift can be personalised based on the recipient’s birth month.

Scented Floral Candles

Scented Floral Candles

Source: Unsplash

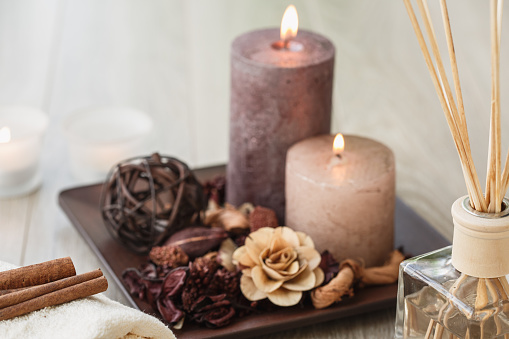
Fill their home with the aroma of spring with scented floral candles. The market is filled with a plethora of soothing scents that will transform their house into a heavenly abode. Fruity, rosy, musky, romantic, rich, woody and so many more – there’s a scented candle for everyone. Many of the candles come in beautiful containers that can be used as containers or showpieces once the wax has run out.

Glass Flowers Centrepiece

Glass Flowers Centrepiece

Source: Unsplash

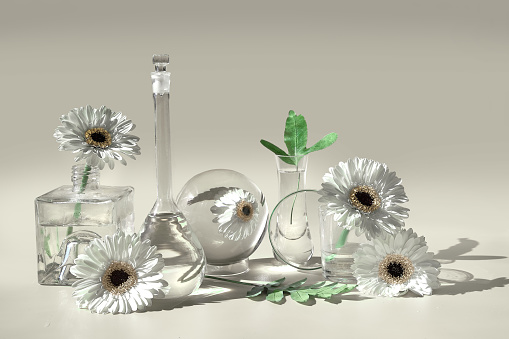
A long-lasting alternative to freshly plucked flowers, glass flower centrepieces make an elegant gift choice. Available in vibrant colours and striking designs, this centrepiece will make great home decor and bring a smile to the recipient’s face. It will truly be a gift to remember. So go ahead and buy it for your loved ones with confidence.

With or without a green thumb – these best floral gifts are amazing when it comes to expressing love, affection and gratitude.

So which idea do you like best? Do you have any other floral gift ideas? Share with us in the comment section below.

Source link


from Best Chandeliers And Home Lighting in Dubai, UAE – Homenoon https://www.homenoon.com/dubai-life/choosing-best-floral-gifts-for-your-loved-ones-home-noon/

5 Different Ways for Decorating Your Garden

Imagine having a book from your favourite author in one hand and a cup of coffee in another while you’re relaxing on a hammock in a beautifully manicured lawn. You can certainly live this dream if you own a villa in Dubai that comes with a lawn.

Many houses and villas in Dubai feature lawns, but they are mostly plain and come without any decoration. It is up to you how you maintain and decorate it to make it a relaxing spot where you can unwind after an exhausting day. Apart from improving the look and appeal of your home, it will also enhance its overall value, enabling you to earn a high ROI when you plan to sell it.

Amazing Ideas for Decorating Your Garden

Ready to transform your lawn? Check out these amazing ideas for decorating your garden and converting it into your ‘happy place’:

Make Use of Garden Ornaments

Starting with the basics, garden ornaments can help a great deal in enhancing the overall look of the lawn. Furthermore, some of them can also serve dual purposes. For example, tree-hung lanterns will not only improve the aesthetics of the garden but illuminate it as well. By carefully placing them on different parts of your garden, you will be able to create a perfectly illuminated space that will draw everyone’s attention. Other than that, you can use twinkle lights as well. It will make your garden an ideal summer hangout spot.

Similarly, a hammock can be installed in your garden. It will give you a place to relax while adding to the décor of your garden.

Get Classy Garden Furniture

The good ol’ garden furniture never goes out of fashion. Depending on the furniture you have selected, you can create a contemporary or classic look in your lawn. The best approach when decorating your garden is to choose furniture that ties up with the overall scheme.

Also, don’t forget to get a parasol or gazebo for placing your furniture underneath. Apart from protecting your furniture from weather elements, such as rain and sunlight, it will also provide you with a nice, shaded place to sit.

Place Ceramic Pots

Placing ceramic pots in your garden will not only amp up the décor but provide you with a wonderful opportunity to flaunt your plants’ collection. However, the selection of the ceramic pots and their placement matters the most here.

If you want to create a modern outlook infused with freshness, choosing white pots placed on wooden stands can do the trick. You can also use them to showcase your painting skills. To add a touch of vibrancy and liveliness, you can select colourful pots with unique designs. Place them tactfully so that they can garner everyone’s attention.

Use an Accent Wall

It is another great idea for decorating your garden and exhibiting your gardening skills. Pick your most beautiful plants and place them artistically on the accent wall. You can also use lighting fixtures to draw everyone’s attention towards this accent wall.

The best part? You can create an accent wall on your own. There are many DIY methods you can follow to create one. However, choose the colours wisely. It should complement the overall theme you’re trying to create.

Add a Water Feature

Add an element of serenity and tranquillity to your garden by placing a water feature, such as a fountain or a birdbath. These features are available in a wide range of types and designs. Select the one that goes with the theme of your garden.

This can prove to be a remarkable way of decorating your garden. The sound of trickling water and chirping waters will create a pleasant ambience. However, don’t go for huge fountains as they can be tough to maintain. Rather, pick a simple and small water feature. It can be used as a charming focal point of your garden.

Decorating Your Garden – An Art That Pays

In all, a garden is a den of nature. For children, it is a field where they are able to play to their heart’s content. For adults, it is a serene sanctuary where they take a sip of coffee and appreciate nature’s beauty. Hence, it is our foremost duty to preserve this earthly treasure that speaks volumes on connecting life, growth and emotions in one frame. So, the next time you’re looking for home upgrade ideas, start with your garden. This is one investment that will certainly pay off in terms of improving the value of your property.

Source link


from Best Chandeliers And Home Lighting in Dubai, UAE – Homenoon https://www.homenoon.com/property-in-dubai/5-different-ways-for-decorating-your-garden/

Sunday, January 30, 2022

Living in an Apartment vs. a Villa in Dubai: a comparative

Villas and apartments are both very popular options for residential properties in Dubai. Whether you are buying or renting, both options are available in different sizes, price ranges, styles, and locations. As such, residents may at times find it hard to decide which type of properties will suit them better.

If you can’t decide between living in a villa or apartment in Dubai, this post is just for you. We have uncovered some of the main factors to consider so that you can easily and confidently make an informed decision.

Price and Size

For most people, price and size are among the most important factors while buying or renting a property. Generally speaking, apartments tend to have a lower entry price than villas in Dubai because villas usually offer a bigger internal space in addition to an external terrace or garden area.

Of course, size directly impacts the price you end up paying. In other words, a 3-bedroom apartment is more expensive than a 2-bedroom apartment or studio in the same building. However, you may find a reasonably priced 3- bedroom villa 30 minutes away from the downtown that can actually cost you less than a two-bedroom apartment located in the center. So, it all depends on the location which we will talk about next.

Location

The other main factor to consider while deciding between a villa and apartment in Dubai is location. Some locations in Dubai offer a wide selection of sales and rental properties, but in many areas your choices are rather limited. For example, Downtown Dubai — one of the top neighborhoods located in the city and popular among buyers and renters for its central location — mainly offers apartments. A prospective resident is likely to find it difficult to get a villa in these parts. In contrast, suburban communities — like Dubailand — almost exclusively have beautiful townhouses and cozy villas.

Maintenance costs

It is important to understand the various maintenance costs involved in an apartment vs. a villa in Dubai. Generally speaking, villas are costlier to maintain than apartments for an obvious reason: A larger space and the lack of shared services (unlike an apartment located in a building).

Lifestyle

Which is a greater priority for you — convenience or privacy?

If you said convenience, an apartment in Dubai is likely to suit you better. Because apartment towers in Dubai tend to be more centrally-located than villas, they are much closer to commercial hubs and leisure activities.

But if you value privacy more than convenience, a villa is likely to work out better for you. In Dubai, villas are almost exclusively located in gated communities or residential areas a little away from the urban hubbub. Because these villas provide a quiet environment, they are perfect for families, especially ones with children. On the other hand, single professionals who want to live near the city center or couples looking for a property that’s a few minutes walk from malls or entertainment options might prefer the convenience of living in an apartment.

Likewise, those who like having a private outdoor space or hate using the lift might prefer the privacy of a townhouse or villa. By contrast, social butterflies may like living in an apartment complex, where they can have more opportunities to chit-chat with the neighbors.

Several trendy villa communities in Dubai — like Emirates Hills — also house nurseries and schools. Therefore, they are a great choice for families with kids. Budget-conscious buyers or renters, however, can consider living in apartments in popular integrated communities, like Jumeirah Village Circle or Mohammad Bin Rashid City, since they offer beautiful apartments and also feature schools and nurseries.

Views

For some buyers or renters this is not an important factor, but for some others the surrounding views is a big thing. Some high-luxury apartments offer unparalleled views, though they usually come with a steeper price tag. If you like to enjoy sweeping views of the Arabian Sea, you may consider a high-floor flat on Jumeirah or the Palm. On the other hand, those who prefer impressive Burj Khalifa or city skyline views are more likely to find apartments in Downtown Dubai to their liking.

Many Dubai villas, in contrast, offer charming greeneries and lake views or golf course views. So, the choice between the two—villa and apartment—may also depend on your personal preference when it comes to the type of surrounding views.

Amenities

Last but not the least, you may also want to consider the facilities and amenities you will have access to. For instance, if you rely on Dubai Metro to commute to your office, an apartment might be a good choice. That’s because most villa communities are little farther away from Dubai Metro.

On the other hand, apartment towers usually offer a shared pool and gym while villa communities offer more extensive facilities, like jogging tracks, tennis courts, community parks…etc.

Source link


from Best Chandeliers And Home Lighting in Dubai, UAE – Homenoon https://www.homenoon.com/property-in-dubai/living-in-an-apartment-vs-a-villa-in-dubai-a-comparative/

Saturday, January 29, 2022

3 Years Later: Table Saw Workbench Update and FAQs

It’s been about 3 years since we built our table saw workbench and we’ve had lots of questions about how it’s holding up, what table saw fence we use, and more. See our update and answers to FAQs here. 

See all the details of the workbench build here and get the plans here. Have a question we didn’t answer? Leave us a comment below or on the YouTube video

18 New Table Saw Fence System For DIY Table Saw Workbench Plans

This post contains affiliate links. Learn more and read our full disclosure policy here. 

Table Saw Workbench Update

I built the table saw workbench to meet a need in our garage shop — a great work surface in our limited space.

Our garage is about 22 feet wide, with a beam in the middle of the space.  The workbench is 4 feet wide by 7 feet long, and 36″ tall (including the rolling caster wheels).

I couldn’t use the full 8-foot plywood in my shop space, but if you can in yours, awesome!

The size and tool layout works great for our space and needs, and I love the T-Track system and accessories!

https://www.youtube.com/watch?v=videoseries

What would you change about the table saw workbench?

For over 3 years, this table saw workbench has been a stellar workhorse of a bench.

It’s a great fit for our garage work space and for the projects and tasks I do regularly.

There are only 2 small changes I’ve considered:

  • Move the router lift more toward the center about 4” to give me more room to use a featherboard against different sizes of wood.
  • Add a longer table saw fence — which I just did! (more info about the fence below).

Readers have suggested other additions, like adding a tape measure, magnifying glass marker, storage drawers — and that’s the beauty of building it yourself! Customize the table with the features you want and need.

17 New Table Saw Fence System For Rolling Workbench

new upgraded 50″ table saw fence system on the workbench

How strong is the workbench? Does it sag or warp?

This table has held up great. Many people have suggested a different assembly method, but there was no need to make it more complicated in the construction of it by using joinery or half lap joints or a torsion box or overbuilding the support system.

I have loaded the workbench up quite heavily with a lot of tools with no issues, and no sagging from the weight of the table saw.

If you’re concerned about the bottom plywood base twisting or warping, you can add extra support underneath (such as an on-edge 2×4 frame that doesn’t get in the way of the casters).

Do the rolling casters move or wobble as you use the saw?

Some readers have reported that their casters still swivel when locked, creating some instability and movement. I haven’t found that to be an issue.

I installed 4 heavy duty locking casters, one on each corner, and between the weight of the table and the stability of the locking casters, I’ve had no problems with instability as I use the table.

Table Saw Workbench @Remodelaholic 8

The 4″ heavy duty polyurethane locking casters I used are no longer available from Rockler but here are a few that are well-reviewed and look comparable:

3 Years Later: Table Saw Workbench Update and FAQs 2022 Best Chandeliers And Home Lighting in Dubai, UAE - Homenoon


Table Saw Workbench FAQs

What table saw do you have?

I have a 20 year old Delta saw that we bought back in college when we started remodeling our house. It’s the Delta Shopmaster model TS300 with a 10″ blade.

At the time we bought it, it was a step or two up from the cheapest available, but it’s a pretty basic model.

Table Saw Workbench @Remodelaholic 31

Delta 10″ table saw with original fence (see upgraded 50″ Vega fence here)

All table saws will be different. To build this workbench around your saw, you will just need to make adjustments according to what you have.

Let me know how it turns out by sending us a message here or by messaging us over on Facebook or Instagram.

What table saw fence do you use on the workbench?

I used the fence that came with my Delta Shopmaster table saw for the last 3 years. I only had it attached to the front. (It had a guide on the back that I had to remove, but it still works just as well.)

That original fence limited me to about 24″ wide cuts. That fence stayed in place by clamping where you pull the lever down.

I found that I didn’t really need additional support on the back side of the fence that just sits on the table.

Recently, though, I upgraded to this the new fence system with a 50″ wide cutting ability. See the install details here — so far I LOVE it!

How do you keep the table saw steady and prevent wiggling?

I have shims under my table saw keeping it level, flush with the table top, and steady. It’s a *really* heavy saw, so it doesn’t move easily.

Using it about weekly, we haven’t had any problems with movement. However if it becomes a problem, we could always add a little glue under the shims, so they stay in place permanently.


Why do you have the table saw on the long side instead of the short side of the workbench? Could I change it?

The table saw is where it is because of the size and layout of my garage. We have a beam in the center of our garage, so we can’t move around or cut boards in that direction.

You could definitely put the table saw on the other side, but it just wouldn’t work with the space in our shop/garage. It’s easier for us to rip full sheets of plywood this way with our setup.


Do you use an outfeed table for support ripping full sheets of plywood?

Right now I have a stand that catches the outfeed. I’ve considered a few other options, such as a drop-down or slide out leaf extension, too.


What kind of router did you use? Is it easy to change the router bit?

Table Saw Workbench @Remodelaholic 16

Why does the router face the outside end of the table instead of the inside of the table?

I like mine close to the edge so I have a place to stand as I push the wood through.

But I could easily turn that fence around and put it on the opposite side for larger pieces of wood (and feed from the other direction). It just may be a little harder to control the wood being routed.

That’s personal preference and it’s worked great for me.

Why did you use T-Tracks instead of dog holes? Are the T-Tracks hard to keep clean of sawdust?

I haven’t ever had a bench with dog holes, so I can’t compare. I love the T-track system though. There are so many ways and clamps to use on them.

The T-tracks are holding up nicely. You do have to keep it clean, but I just brush it out regularly and it’s fine.

Table Saw Workbench @Remodelaholic 18

Why isn’t the table a full 4×8 sheet of plywood?

I designed it to be 7’ long because that fits better in my shop than a full 8’. The bottom is a bit smaller to provide a bit more foot space, and I do think it looks nicer.

I just wanted the top to be full size and I wasn’t worried about the bottom being smaller.

If you have the room and want the top and bottom to be wider that would still work. Send me a picture when you get it built.

How do you handle dust collection from the table saw?

We plan to add some doors and connect it with our dust collection system. But for now, I put a board up in front while cutting and that works great.

Dust Right Photo 768x432

see more of our current Dust Right dust collection system setup

How much did it cost to build?

Could I use MDF or less expensive plywood to build the workbench?

I wouldn’t recommend because using MDF for the workbench because MDF is very prone to moisture. It might work if you had a really low humidity workshop, but I prefer the plywood.

You could definitely try a less expensive plywood, though. We chose a high quality birch plywood (even though this is “just a work table”) because we like the look and added durability — and the extra $15 for a sheet (at the time) wasn’t a deal breaker for us.

With current lumber costs, a higher grade plywood might be something you decide against. But keep in mind that cheaper plywood might not be as smooth or as durable for your work table surface, and also might be a factor in the base twisting or warping as mentioned above.

18 New Table Saw Fence System For DIY Table Saw Workbench Plans

How has the polyurethane finish held up to scratches? Is there a better work table finish?

I have noticed that my polyurethane finish does get small scratches. I have not tested any other finishes though.

Any painted or sealed work surface will get scratches. You could try using a sheet of laminate or melamine as an alternative.

As you can see (or not see) in the photo above — the work table finish is still overall in great shape with no visible scratching or damage.

What CAD software did you use to design the bench plans?

I use SketchUp. It’s a great 3d program for creating your own models and diagrams.

Do you have SketchUp plans for sale?

We don’t offer the 3D model but you can purchase the printable woodworking plan with our modeled sketches here. The uncomplicated build makes it easy to adjust to fit your needs and your table saw.

What can I build on this sweet new table saw workbench?

What we love about this workbench is that it is so versatile.

It’s great for ripping boards and plywood to width.

It’s also great assembly table with the huge workspace and built-in T-tracks and clamps.

So you can build ANYTHING you want, but here are some of our favorites: 

Any more questions?

Leave your questions in the comments below, or drop us a line at [email protected]

Read more about the table saw workbench:

Pin this to save and share: 

DIY Table Saw Workbench Update FAQs Durable Strength, Remodelaholic

Remodelaholic is a participant in the Amazon Services LLC Associates Program, an affiliate advertising program designed to provide a means for sites to earn advertising fees by advertising and linking to amazon.com. Please see our full disclosure here.
3 Years Later: Table Saw Workbench Update and FAQs 2022 Best Chandeliers And Home Lighting in Dubai, UAE - Homenoon

About Cass

Cassity started Remodelaholic with her husband, Justin, to share their love for knocking out walls together. Since then, Remodelaholic has become a great community and resource for all those wanting to know how to make their builder-grade home BEAUTIFUL on a budget!


from Best Chandeliers And Home Lighting in Dubai, UAE – Homenoon https://www.homenoon.com/dubai-life/3-years-later-table-saw-workbench-update-and-faqs/

Thursday, January 27, 2022

A Gal-entine’s Day Chat with Jewelry Designer Jane Winchester Paradis – Home Lighting Ideas

Hi there, cuties! I have to say…with Valentine’s Day–or rather, Gal-entine’s Day as we like to say here at KKH–around the corner, I am really feeling the love! And what better way to share that loving feeling with you all than with a super-fun giveaway with the oh-so-lovely Jane Win Jewelry?

Through the end of the month, Kathy Kuo Home has teamed up with Jane Win (not to mention several other amazing, female-founded brands) on a very special Gal-entine’s Day giveaway worth $1,800! You can get all the deets on the giveaway below.

And to really celebrate this giveaway and the loving spirit of the Gal-entine’s Day season, I’m also sooo excited to introduce you all to Jane Win Jewelry founder and designer Jane Winchester Paradis! I can’t say enough about this inspiring woman–not only is she a fellow creative entrepreneur, but she’s a mama-of-five and has so much wisdom and light to share!

Read on for an inspiring Q&A (and prepare to seriously want to start jewelry shopping)!


banner


One lucky winner will receive a $300 Gift Card to each of the below six brands (a total value of $1,800): 

How to Enter:

The giveaway will live through January 31, 2022, at 11:59pm EST. The winner will be announced on the Jane Win Instagram on February 1, 2022. You can also learn more about this giveaway HERE!


woman posing in jewelry

At home striking a pose in my Jane Win pieces.


The Chicest Coin Jewelry — Made with Love, Passion & Irreverence 

Confession: I am obsessed with founder stories! Tell me everything about how you pivoted from a career in fashion marketing to owning and designing Jane Win Jewelry (which I am also obsessed with, obviously)?

Jane Winchester Paradis: I love talking about my path to Jane Win, as it has been a wild one. I have lived a nomadic life up and down the East Coast–I was born in New Hampshire, spent my childhood in Georgia, went to boarding school in Massachusetts, went to college in Florida, and then spent many years in NYC before I settled outside Philadelphia.

I had a robust career in design and fashion marketing, working for brands such as Calvin Klein Cosmetics, Barneys New York, and Lilly Pulitzer. I am very happily married to my husband Doug, who we lovingly refer to as Mr. Jane Win, with five kids between us (ages 24,22, 20, 20, and 17).

“I started Jane Win when I was 45, probably what some would consider ‘too late’ but for me it was just right… When my youngest, Tiki, was about to enter high school I had this moment of pause–I wanted to start something from scratch, have some more flexibility to be around for the kids, to build a brand and have them be a part of it.”

Now, all five kids have worked on Jane Win in some way and the last four years have been incredible as we built our company and created some fabulous product and authentic relationships with our customers and have done it all through the craziness of COVID.


Shop Jane Win Jewelry


I always say that our main motto here at KKH is “love where you live”–do you have a similar guiding light or mission for Jane Win?

Jane Winchester Paradis: We have a set of core values that we wrote before we started the company and that we use every day to make decisions:

  • We make beautiful things that embody strength and positivity. We expect our designs to be passed from generation to generation with love. 
  • We are not afraid to be ourselves. We are happy, have fun and celebrate a little irreverence. 
  • We are humble. We embrace individuality. We treat everyone (customers, employees, and vendors) with respect. We take the time to do things right. 
  • We run a modern, visionary business. We create and adapt innovative strategies to build a strong company that delivers a special experience to our consumer. We surpass expectations. 
  • We share. When the company succeeds, we share in our good fortune.

Even though I am in *love* with pretty much everything you sell, I’m curious about which products would you consider to be your “signature” items in your jewelry line? 

Jane Winchester Paradis: The core of our brand is coin jewelry. Each coin has a design on one side, and a word paired with our crescent moon and star logo on the other. Each piece ships in the prettiest printed box with a card that explains the word on the coin and the meaning behind the piece.

“There is a design for each different milestone in your life. Each coin and design is meant to hold meaning for the wearer.” 

There is a feeling, a direction, an intent to each piece. Some are light hearted, like celebrating LUCKY in all its forms. Some are serious, like our PEACE coin to give you a touchstone to someone you have lost. Some are full of emotion, like the JOY we feel from motherhood.


woman standing in doorway

The lovely Jane Winchester Paradis


Inspired Entrepreneurship & Customer Connections at Jane Win Jewelry

One thing I love to ask fellow entrepreneurs is where they draw their inspiration from! What’s your biggest source of inspo as a designer? What makes you say “Oh yeah, that needs to be on one of my coins”?

Jane Winchester Paradis: Ohhh, I am truly all over the place but if I had to choose, really it’s art and my own crazy drawings.

“I love to sketch, it gives me time to dream. I love looking through art books. And the symbolism that we see in flowers, in animals, in the stars–they all come together for me in funny little doodles that then become pieces of jewelry.”

We have an incredible designer in house that I work with to bring it to life. Literally sometimes I will say: “I had this dream about a new piece” and they will create something based on a dream I had about a fox.


I know first-hand that running a business–especially one based in a creative field–is a rollercoaster sometimes! What have the biggest joys and challenges been for you as an entrepreneur?

Jane Winchester Paradis: The biggest joy? It’s the connections! It is building a brand that has employees that come to work and laugh and have fun creating our brand.

“The biggest joy comes from the authentic connections. It’s chatting with customers and having them connect to a coin so much that it brings them to tears–this happens a lot with moms buying the Forever coin for their daughter.”

I would say the biggest challenge is staying confident in your unique point of view and building something despite the rejections, despite people wanting you to follow a trend. The confidence it takes to be an entrepreneur is staggering!


Shop Jane Win Jewelry


The Spirit of Gal-entine’s Day? Women Supporting Women!

I have to be super-honest for a minute: I really feel like you and I have so much in common–both business founders, both moms, both in creative fields. For me and my team, this partnership just seems so natural! What drew you to KKH when you were thinking about giveaway partners?

Jane Winchester Paradis: Love this question! You know, I have felt for a long time that there was “talk” about women supporting women…but there wasn’t as much action.

I am so completely drawn to you and your business, Kathy, because you genuinely takes time and energy to pull women up with you.

I want to do the same. You have to take action. You have to be authentic in the effort. That is so clearly the case with you–so you’re like a magnet for goodness!


Finally, is there anything new and exciting on the horizon for your business that you’d like to share with the Kuotes cuties?

Yes–so so much! We are an online digital-first brand, so we have thrown out the traditional seasonal launches and we introduce new product almost every week. You can sign up for our emails to stay in the loop.

“We have a million new hearts coming soon, we have a giant collection to celebrate Mother’s Day–very special and meaningful pieces. In addition to all that newness, we are launching a Bridal Gifting Suite of product to help brides find gorgeous sentimental pieces for their bridesmaids.”

The packaging is just stunning and we are making it all customizable, from their monogram on perfect baby blue jewelry pouches to engravable charms for names and dates not to be forgotten! 


portrait of a woman at home


Shop Valentine’s Day Gifts from Kathy Kuo Home


Kathy Kuo Home Design Services

Feeling inspired by KKH and Jane Win Jewelry? In addition to being a source for beautiful high quality furnishings and decor, Kathy Kuo Home has a team of professional interior designers that are ready to assist with all of your interior design needs. Our services provide multiple layout and design options that fit your style and budget for any room. You will work with a team of designers and project managers to help you truly love where you live.

This post contains affiliate links; we may earn a commission for clicks and transactions. 


Source link


from Best Chandeliers And Home Lighting in Dubai, UAE – Homenoon https://www.homenoon.com/reviews/a-gal-entines-day-chat-with-jewelry-designer-jane-winchester-paradis-home-lighting-ideas/

Wednesday, January 26, 2022

Stackable Countertop Storage Bin Plans + Tutorial

Learn to build a set of easy stackable countertop storage bins for potatoes, toys, or other small items. Free plans and a full step-by-step tutorial. 

Clear more countertop clutter with 25 great charging station ideas or these awesome DIY wall organizer ideas. 

Beginner DIY Countertop Stacking Storage Bin for Potatoes and Root Vegetables

Build an Easy Stackable Countertop Storage Bin

Hello again! I’m Jamison from Rogue Engineer and today I’m sharing the tutorial and detailed instructions for our root vegetable countertop storage bin.

For the longest time my wife has been storing the potatoes and onions in a large bowl in the pantry.

Not only does this take up too much space but it’s overflowing and the idea to build this root vegetable storage bin was born.

DIY Root Vegetable Storage Bin for Pantry Shelves

This angled wood crate fits perfectly on our pantry storage shelves or on the kitchen counter. You can build a couple of storage boxes and stack them, too.

It’s also very easy to build with these instructions — perfect for a beginner, with no woodworking skills or experience required.

All you need is a saw and a nailer — whether that’s a miter saw or a circular saw or a jigsaw, and a pneumatic nailer or a good ol’ hammer and nails.

A nice sturdy upgrade over the plastic storage bins I see in the stores!

This post contains affiliate links. Learn more and read our full disclosure policy here. 

Need something larger? Build this tiered toy organizer cubby shelf.
Want something taller for bottles? Make these easy rustic storage bins.

How to Build a Stackable Countertop Storage Bin

Get a printable PDF of these plans

Required Tools

Materials

Click here to see Rogue Engineer’s Vegetable Bin Plans

Cut List

DIY Vegetable Bin Plans - Cut List

The width of this bin can be easily adjusted by changing the length of the 22-1/4″ and 20-3/4″ boards.

DIY Wood Stacking Bin Instructions

Cut the Wood Stacking Bin Pieces

Cut the boards to length as shown in the cut list.

To cut the sides – first make the 30 degree cut as shown.

DIY Root Vegetable Storage Bin - Step 1

make the 30-degree cut

Then flip the board over and make the 25 degree cut as shown.

DIY Counterop Stacking Storage Bin - Step 2

make the 25-degree cut

Then trace the side and cut out one more just like it.

DIY Root Vegetable Countertop Stackable Storage Bin - Step 3 - Trace angled bin sides

How to Build the Stackable Storage Bins

With all your boards cut you can get started gluing and nailing it all together.

Step 1: Nail the back of the bin to the sides

DIY Stacking Countertop Storage Bin - Step 4 - glue together

I started by nailing the back to the sides.

Notice that the back piece is attached to the back edge of the sides — not the sides to the edge of the back piece.

Dry fit the pieces together to make sure you have them in the right layout if needed! 

DIY Countertop Stackable Storage Bin - Step 5 - glue and nail the sides to the back

DIY Stacking Countertop Storage Bin - Step 6 - glue and nail the sides to the back

Step 2: Attach the bottom bin piece

Glue and nail the bottom on as shown.

DIY Countertop Stackable Storage Bin - Step 7 - glue and nail the back

Step 3: Attach the bin front piece

Glue and nail the front 1×4 in place as shown.

DIY Countertop Stacking Storage Bin - Step 8 - glue and nail the front piece

Step 5: Attach the bin top

Attach the top, again, making sure to glue and nail in place.

DIY Stacking Countertop Storage Bin - Step 9 - glue and nail the top

Finishing the stacking wood storage bins

I tried something a little different this time. After giving everything a good sand, I stained the edges with Antique White wood stain from Varathane.

DIY Root Vegetable Storage Bin - Step 10 - stain with varathane whitewash wood stain

Then, once the stain dried, I painted with Serenity Blue Chalked Paint from Rustoleum and distressed the edges to reveal some of the Antique White stain for a subtle difference in color.

DIY Countertop Stacking Storage Bin - Step 11 - paint with serenity blue chalk paint and distress

How to Stack the Countertop Storage Bins

I also wanted to include this shot to show how easy it would be to stack two of these together.

By simply using a couple of screws and screwing these two units together you now have a two tiered storage bin for root vegetables! or use it for other pantry essentials, or for toys, craft supplies, tools, etc.

For subsequent stacking bins, you could leave off the top and let the bottom of the next bin act as the top of the bin below it, too.

DIY Stacked Root Vegetable Storage Bin

I hope you enjoyed this tutorial. For sneak peeks of our upcoming projects from Rogue Engineer be sure to follow me on Facebook and Instagram.

—————————————

More storage solutions you can build this weekend:

DIY Wood Countertop Stacking Storage Bins, Easy Beginner Build, Free Woodworking Plans, Remodelaholic

First published 25 Apr 2015 // Last updated 26 Jan 2022


Remodelaholic is a participant in the Amazon Services LLC Associates Program, an affiliate advertising program designed to provide a means for sites to earn advertising fees by advertising and linking to amazon.com. Please see our full disclosure here.
Stackable Countertop Storage Bin Plans + Tutorial 2022 Best Chandeliers And Home Lighting in Dubai, UAE - Homenoon

About Jamison @ Rogue Engineer

Hey guys! I’m an aerospace engineer and DIY blogger at RogueEngineer.com where I write super easy DIY furniture plans! (No woodworking experience required.)


from Best Chandeliers And Home Lighting in Dubai, UAE – Homenoon https://www.homenoon.com/dubai-life/stackable-countertop-storage-bin-plans-tutorial/

Monday, January 24, 2022

Silhouette Sharpie Mugs for Valentine’s Day

DIY Sharpie Mugs are a great idea for a valentine gift for your special someone. Personalize a mug with your own personalized touches. We will show you how to make your own sharpie mugs.

Other great DIYs with Sharpies: 15 Sharpie Walls, Faux Bois Pitcher, and Sharpie jewelry dishes.

DIY Valentine Silhouette Mugs Gift Idea via remodelaholic.com DIY Sharpie mugs

Silhouette Sharpie Mugs for Valentine’s Day

We have a new tutorial on our YouTube channel today!  Have you subscribed?  I hope so! We have at least one new video every Saturday!  (plus one or two sprinkled in through out the week!)

The tutorial is a fun variation on DIY sharpie mugs, just in time for Valentine’s Day!!  Basically, while I was shopping at the craft store I saw some really cool silhouette stickers and they were perfectly inspiring!  I knew I had to find a way to use them and this tutorial for DIY sharpie mugs was born!


Please watch the video tutorial and give us a thumbs up!

Sharpie Mug Supplies:

This list may contain affiliate links.

  • White (or light colored) Ceramic Mugs
  • Silhouette stickers (I bought mine at Hobby Lobby)
  • Ceramic Sharpies or Pens
  • Optional – Rubbing alcohol (for mistakes!!)

Pro tips if you don’t want to use stickers:

  1. If you don’t want to buy stickers you could cut out a silhouette of a girl or one of a boy (those are just google searches) and tape it in place, you would just need to be a LOT more careful when you outline it, that the paper doesn’t bend or move in anyway!!
  2. A sticker machine could be used to create your own sticker using a paper silhouette.
  3. Or using a cutting machine cut out any silhouette with vinyl and create your own sticker.

Sharpie Mug Instructions:

  1. Follow the instructions in the video for creating your decorative silhouette sharpie mug!
  2. When you feel like you have your finished mug design, place it on a cookie sheet and place it in the oven, while the mugs are in the oven, heat the oven to 350° and once it has reached 350°, bake for 30 minutes.
  3. Then turn off the oven and allow the mug to cool in the oven completely without opening the oven door.
  4. BAM!  You are done!

More great Valentine’s Day Ideas:

Please pin this post for later:

DIY Easy Diy Silhouette Mugs With Ceramic Sharpies By @remodelahoilc How to make personalized DIY Sharpie Mugs

Originally published 2.4.2017 // Updated 1.24.2022

Remodelaholic is a participant in the Amazon Services LLC Associates Program, an affiliate advertising program designed to provide a means for sites to earn advertising fees by advertising and linking to amazon.com. Please see our full disclosure here.
Silhouette Sharpie Mugs for Valentine's Day 2022 Best Chandeliers And Home Lighting in Dubai, UAE - Homenoon

About Cassity

Cassity started Remodelaholic with her husband, Justin, to share their love for knocking out walls together. She is an interior designer, wife, and mother of two. She and Justin have remodeled three homes from top to bottom and are working on their fourth. Making a house a home is her favorite hobby.


from Best Chandeliers And Home Lighting in Dubai, UAE – Homenoon https://www.homenoon.com/dubai-life/silhouette-sharpie-mugs-for-valentines-day/

Hello world!

Welcome to WordPress. This is your first post. Edit or delete it, then start writing! from Homenoon https://www.homenoon.com/hello-world...